![]()
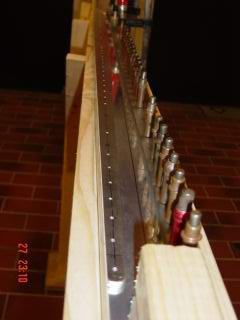 27.08.2002 START! The main spar of the horizontal stabilizer. 2 profiles drilled to the spar. You drill into the jig and cleco as you go. |
|
 After
priming and riveting. I use Zincchromate from PPG DeSoto,
used at Airbus Industies as well. It's not easy to get,
see the download area for the data-sheet and sources to
buy it. To get some Marihuana is more simple. This is
bullet-proof stuff, but you get cancer for free, if you
are mad enough to spray without clean air supply. That's
the reason, why buying it is so hard. (BTW, to buy dope
is easier AND less expesive, I think. As they've called
up the price, I got a little depressive...) After
priming and riveting. I use Zincchromate from PPG DeSoto,
used at Airbus Industies as well. It's not easy to get,
see the download area for the data-sheet and sources to
buy it. To get some Marihuana is more simple. This is
bullet-proof stuff, but you get cancer for free, if you
are mad enough to spray without clean air supply. That's
the reason, why buying it is so hard. (BTW, to buy dope
is easier AND less expesive, I think. As they've called
up the price, I got a little depressive...) |
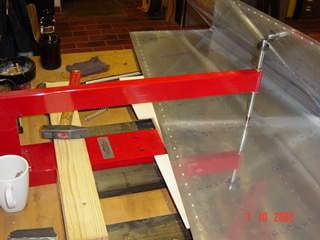
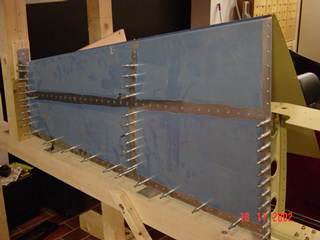
 Now you
have to measure up all ribs, place and drill them. The
skin is simulated by little strips of scatch. The spar is
locked to the jig for a leveled alignment. Now you
have to measure up all ribs, place and drill them. The
skin is simulated by little strips of scatch. The spar is
locked to the jig for a leveled alignment. |
 Skeleton
all done, time to fit the skin. Skeleton
all done, time to fit the skin. |
 Here I
don't followed the manual. They suggest to drill through
the skin directly into the skeleton. Then chance of
misalignment was to great for me, so I did it in a
different way. I clamped one side, peeled back the
opposite one and marked the position of the ribs with a
sharpie. The same procedure on the other side, then I
took off the skin, made the layout of the rivet-lines on
the inside of the skin, predrilled the holes from that
side, clamped it back on the skeleton and drilled with
the correct size. No chance of missing a rib and
beautiful rivet-lines! Here I
don't followed the manual. They suggest to drill through
the skin directly into the skeleton. Then chance of
misalignment was to great for me, so I did it in a
different way. I clamped one side, peeled back the
opposite one and marked the position of the ribs with a
sharpie. The same procedure on the other side, then I
took off the skin, made the layout of the rivet-lines on
the inside of the skin, predrilled the holes from that
side, clamped it back on the skeleton and drilled with
the correct size. No chance of missing a rib and
beautiful rivet-lines! |
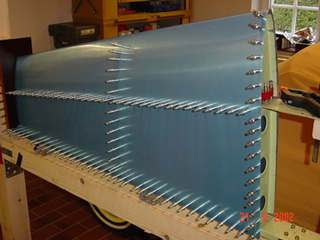 Hellraiser?? Hellraiser??No, the drilled skin, clecoed to the skeleton. |
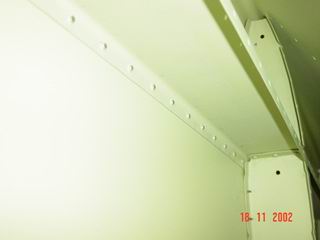
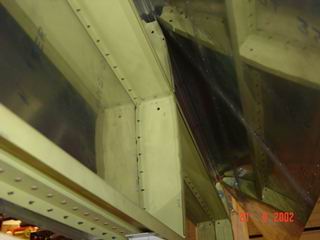 This is
how it looks from the inside. The upper (front) side ist
clecoed, the other side is peeled back for taking the
picture. This is
how it looks from the inside. The upper (front) side ist
clecoed, the other side is peeled back for taking the
picture. |
 The
ready-drilled skin must be dimpled with the C-frame-tool. The
ready-drilled skin must be dimpled with the C-frame-tool. |
 This is
how it looks after dimpling. This is
how it looks after dimpling. |
 Cleco it a
last time..... Cleco it a
last time..... |
 Vernieten!
(Die Daten auf den Fotos stimmen. Ich habe die Haut erst
aufgenietet, nachdem Wilhelm Tank, mein (sehr netter,
RV6-bauender!) Blechprüfer, alles gesehen hat. In der
Zwischenzeit habe ich das Seitenleitwerk bis zum selben
Stadium gebaut)...and rivet. I had to make a break,
because the offical inspector (Wilhelm Tank, a very nice
guy and builder of a RV6) had to take a look inside. I
passed that inspection, so I started to close the
stabilizers. Vernieten!
(Die Daten auf den Fotos stimmen. Ich habe die Haut erst
aufgenietet, nachdem Wilhelm Tank, mein (sehr netter,
RV6-bauender!) Blechprüfer, alles gesehen hat. In der
Zwischenzeit habe ich das Seitenleitwerk bis zum selben
Stadium gebaut)...and rivet. I had to make a break,
because the offical inspector (Wilhelm Tank, a very nice
guy and builder of a RV6) had to take a look inside. I
passed that inspection, so I started to close the
stabilizers. |
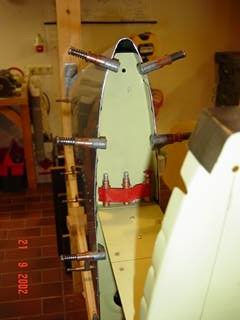
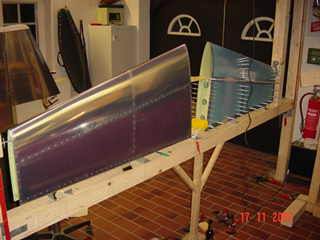 One half
closed..... One half
closed..... |
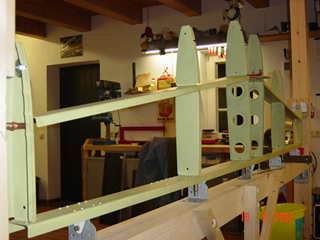
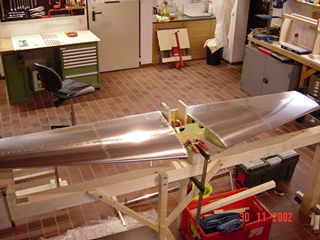 ....and
finally the horizontal stabilizer is done! The fiberglass
tibs will be installed together with all other fiberparts
at the end of this part of the project. ....and
finally the horizontal stabilizer is done! The fiberglass
tibs will be installed together with all other fiberparts
at the end of this part of the project. |
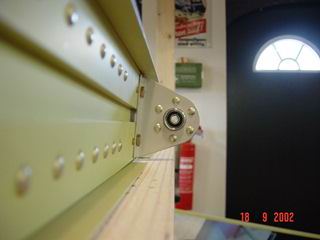
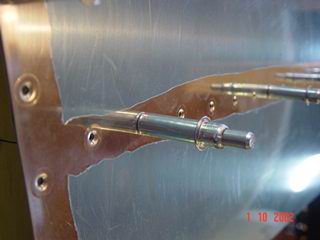
 Then the brackets for the elevator are
aligned and bored.
Then the brackets for the elevator are
aligned and bored.