![]()
Here I'll show some more detailed pics, so you can oversee the whole process. This is for general use and to make yourself a picture of the necessary steps. Builders won't get new informations here, but many people (like me) use the Internet before the make the decision to start. |
|
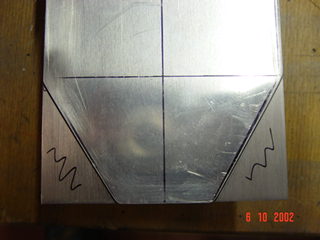
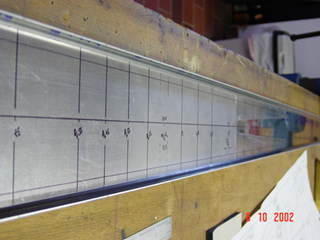 First
step: Draw a centerline, mark the rivet spacing and
predrill the holes. First
step: Draw a centerline, mark the rivet spacing and
predrill the holes. |
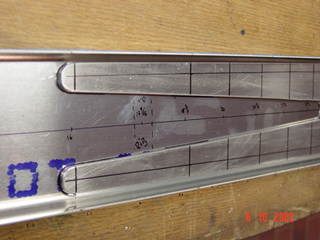 Then you
have to mark the cutting-lines and trim the doubler. Then you
have to mark the cutting-lines and trim the doubler. |
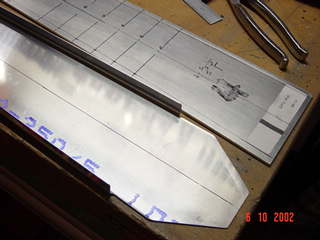 Now the
lower end is trimmed to the plans. Cutting discs and a
Dremel work great here. Offset snips would bent the
aluminum. Don't do that on 90degree bents! Now the
lower end is trimmed to the plans. Cutting discs and a
Dremel work great here. Offset snips would bent the
aluminum. Don't do that on 90degree bents! |
 After
everything is marked and triple-checked, it's time to
drill. Straight into the working surface and clecoed
after each hole. This way there's no chance of
misalignment. After
everything is marked and triple-checked, it's time to
drill. Straight into the working surface and clecoed
after each hole. This way there's no chance of
misalignment. |
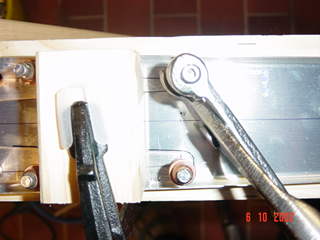
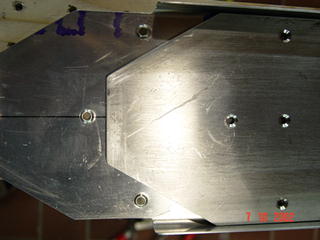
 Now the
parts are aligned and trimmed to match. Now the
parts are aligned and trimmed to match. |
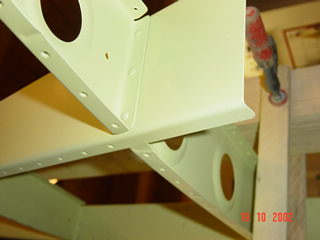
 The
brackets are aligned by a tight drawn wire, so they match
to the centerline and to each other. The
brackets are aligned by a tight drawn wire, so they match
to the centerline and to each other. |
 Disassambled
once more. Now you have to dimple the rivetholes, either
by dimpling with a squeezer or machining, if the
thickness of the skin will allow it. (See tool section) Disassambled
once more. Now you have to dimple the rivetholes, either
by dimpling with a squeezer or machining, if the
thickness of the skin will allow it. (See tool section) |
 Now smooth
all flanges, file all edges to a round shape, treat the
surface with some Scotchbrite, clean with Aceton, prime
and spray with Zincchromate at last. I think is not a
good idea to go cheap at this point. You will never reach
these places after riveting. Corrosion-protection is a
must, esp. here in northern Germany. If you build and fly
in Mexico, maybe you will trust the ALCLAD. Now smooth
all flanges, file all edges to a round shape, treat the
surface with some Scotchbrite, clean with Aceton, prime
and spray with Zincchromate at last. I think is not a
good idea to go cheap at this point. You will never reach
these places after riveting. Corrosion-protection is a
must, esp. here in northern Germany. If you build and fly
in Mexico, maybe you will trust the ALCLAD.(Most parts of the RV's are plated with a thin layer of pure aluminum for corrosion-protection, but it is easily scratched when handling the parts during construction) |
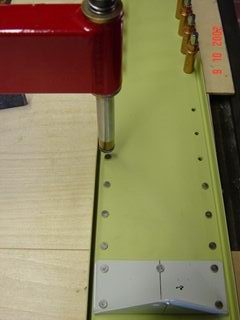 After all:
Time to rivet! The C-frame tool works great here.... After all:
Time to rivet! The C-frame tool works great here.... |
 ...but
some rivets will bent, anyway. So, drill out very
carefully, replce, strike again, drill out once more and
strike. Another beer, drill out........and try to keep
cool. (Not that easy) ...but
some rivets will bent, anyway. So, drill out very
carefully, replce, strike again, drill out once more and
strike. Another beer, drill out........and try to keep
cool. (Not that easy) |
 Done it! Done it! |
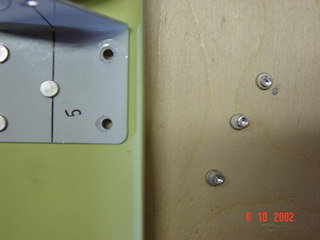
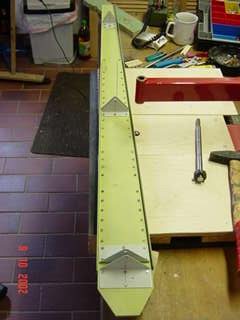
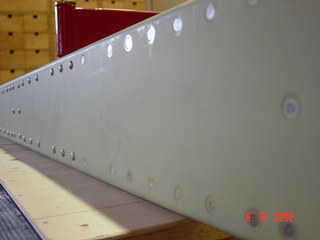 Here you
can see the AN426 countersunk head rivets in front. You
achieve a smooth surface. At this place the vertical
stabilizer will match to the fuselage later (much later,
grin) Here you
can see the AN426 countersunk head rivets in front. You
achieve a smooth surface. At this place the vertical
stabilizer will match to the fuselage later (much later,
grin) |
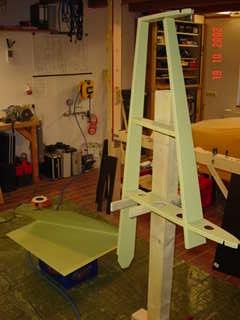
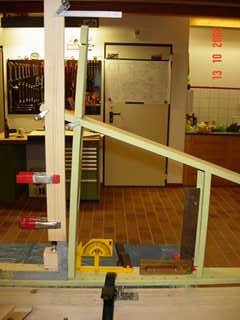 This foto
was taken in the 'pre-laser-aera', so strange
constructions were built to align the skeleton. There is
simply no straight, parallel line you can measure from,
so you have to be tricky. This foto
was taken in the 'pre-laser-aera', so strange
constructions were built to align the skeleton. There is
simply no straight, parallel line you can measure from,
so you have to be tricky. |
 Skinning
is the same as done with the horizontal stabilizer. Skinning
is the same as done with the horizontal stabilizer. |
 After
this, the parts are ripped apart once more, edges and
corners have to be smoothed, holes deburred and dimpled
and the surface has to be cleaned. Then prime and
protect. After
this, the parts are ripped apart once more, edges and
corners have to be smoothed, holes deburred and dimpled
and the surface has to be cleaned. Then prime and
protect.Before anything goes together forever, you have to assamble and disassamble parts ten times and more. |
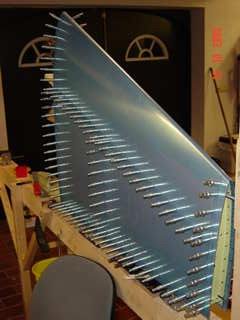
 Close shot
of the skeleton, ready to skin. Close shot
of the skeleton, ready to skin. |
 Skinning
is a nerve-wracking job. You have to crawl on the floor
sometimes, your hand and the bucking-bar are trapped
inside the stabilizer, you are trying to imagine, if the
bar sits in the correct position to that rivet, the other
hand is holding the rivet gun, your eyes try to watch
around corners to align gun and surface, and then you
fire the gun. Puuh! If the bucking-bar slips off the
rivet or the gun is taken off too soon, you will produce
a half-moon-shaped mark on your new part. No need the
heat the shop here for me, I came out soaking wet with
one moon on the counter. Skinning
is a nerve-wracking job. You have to crawl on the floor
sometimes, your hand and the bucking-bar are trapped
inside the stabilizer, you are trying to imagine, if the
bar sits in the correct position to that rivet, the other
hand is holding the rivet gun, your eyes try to watch
around corners to align gun and surface, and then you
fire the gun. Puuh! If the bucking-bar slips off the
rivet or the gun is taken off too soon, you will produce
a half-moon-shaped mark on your new part. No need the
heat the shop here for me, I came out soaking wet with
one moon on the counter. |
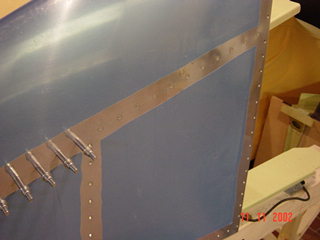
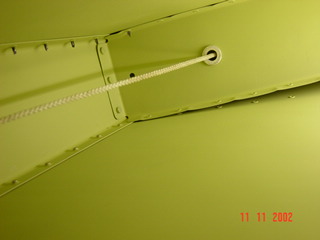 At the
beginning you can peel back the skin and control the
rivets. The wire is a placeholder for the cable of the
beacon on top of the stabilizer. Once closed, you are in
trouble without it. At the
beginning you can peel back the skin and control the
rivets. The wire is a placeholder for the cable of the
beacon on top of the stabilizer. Once closed, you are in
trouble without it. |
 Vertical
stabilizer all done! Vertical
stabilizer all done! |
 This is how the parts come out of the box,
except of the markings on the doubler.
This is how the parts come out of the box,
except of the markings on the doubler.