![]()
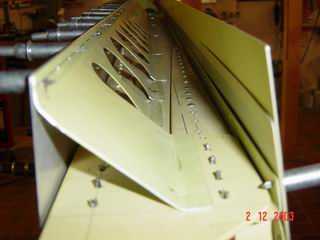
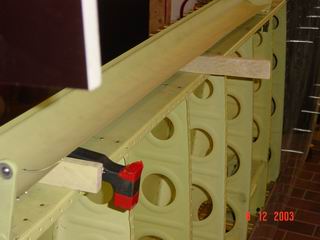
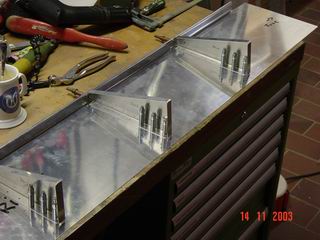 This is
the flap bottom skin. At first I've fitted the inner
ribs. These are full ribs, no stiffners as on the
ailerons. The flaps will hang down into the slipstream by
40 degrees, so they have to be stronger than the
ailerons. Lay a staight edge over all ribs, I had to
rebent the inner ones, the were slightly higher than the
outside ones. This is
the flap bottom skin. At first I've fitted the inner
ribs. These are full ribs, no stiffners as on the
ailerons. The flaps will hang down into the slipstream by
40 degrees, so they have to be stronger than the
ailerons. Lay a staight edge over all ribs, I had to
rebent the inner ones, the were slightly higher than the
outside ones. |
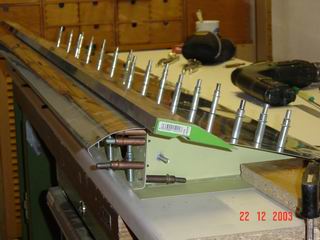
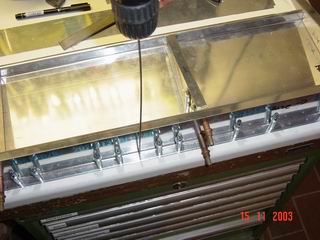 The next
step is to drill the spar to the inner ribs. As you can
see, there is a double surface on my workbench. You jig
the flaps on the bench, so it is very important, that the
workbench is level. There are some stories about twisted
flaps, but mine came out straight. You will find the
correct drilling sequence in the book '21 years of
RVator'. The manual said that the flaps are most easily
to build movable surfaces. I think the ailerons are. So
be sure the flap skin is firmly down on your level
workbench, before you drill anything. I should have had
my angle-drill at this time, but I had to take the long
drillbit instead. Meanwhile I bought a CP(Desoutter)
pneumatic one at EBAY's for a very good price: 55 Euros
and as-good-as-new! The next
step is to drill the spar to the inner ribs. As you can
see, there is a double surface on my workbench. You jig
the flaps on the bench, so it is very important, that the
workbench is level. There are some stories about twisted
flaps, but mine came out straight. You will find the
correct drilling sequence in the book '21 years of
RVator'. The manual said that the flaps are most easily
to build movable surfaces. I think the ailerons are. So
be sure the flap skin is firmly down on your level
workbench, before you drill anything. I should have had
my angle-drill at this time, but I had to take the long
drillbit instead. Meanwhile I bought a CP(Desoutter)
pneumatic one at EBAY's for a very good price: 55 Euros
and as-good-as-new! |
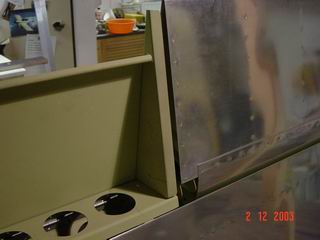
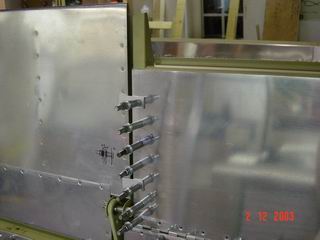
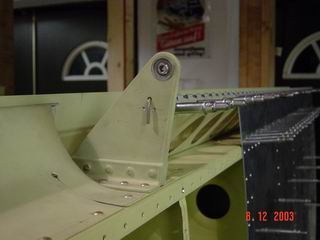
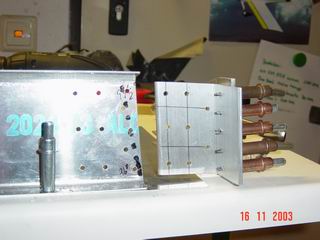 The flap
spars inboard end. This is the reinforcement bracket. The
pushrod for the flap will be connected to this thing
later. There is no straight edge here, and it takes some
time to make all the bars and plates and angles fit each
other. Be careful when you rivet these parts together,
there is only one sequence that will allow you to reach
all rivets. I've taken care of that with the first flap,
but why not with the second one? You see the row of
clecoes on the right? I riveted that row too early and
was'nt able to reach the rivets that go into the rib/top
skin. So I had to drill them out again. Too late? Too
much liquid building assistance? The flap
spars inboard end. This is the reinforcement bracket. The
pushrod for the flap will be connected to this thing
later. There is no straight edge here, and it takes some
time to make all the bars and plates and angles fit each
other. Be careful when you rivet these parts together,
there is only one sequence that will allow you to reach
all rivets. I've taken care of that with the first flap,
but why not with the second one? You see the row of
clecoes on the right? I riveted that row too early and
was'nt able to reach the rivets that go into the rib/top
skin. So I had to drill them out again. Too late? Too
much liquid building assistance? |
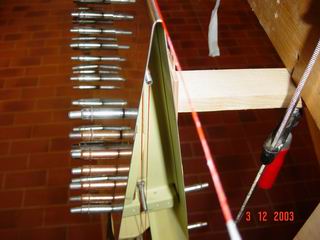
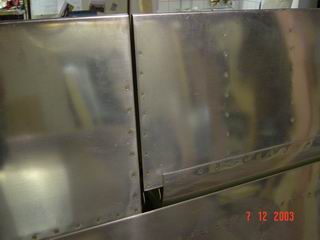
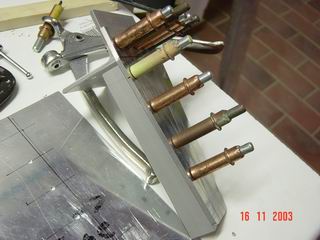 Another
shot of that thing. There is no straight edge on it.... Another
shot of that thing. There is no straight edge on it.... |
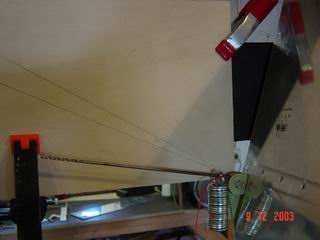
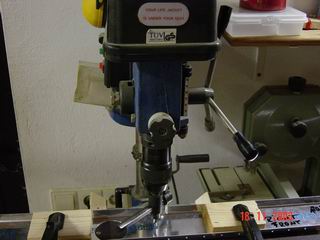 You can't
read it, but that tag on the drill says: Your life jacket
is under your seat ;o) You can't
read it, but that tag on the drill says: Your life jacket
is under your seat ;o)At first I was worried about the fly-cutter, but if you clamp down the spars, it works great. Thank you, Günther, for the express delivery of that cutter. (I don't have a fly-cutter, and Günther, the former owner of this kit, sent his one.) |
 It's worth
the affort! It's worth
the affort! |
 This is
the flap barce. It is stepped down to clear the rear spar
reinforcings at the root side of it. This brace is the
achilles heel of the flap position, so drill it only to
the wings rear skin at this time. Once the partly
assambled flap is installed, you can shift it until the
lines of flap and aileron match, then you can drill some
holes to fix iton the spar. The piano hinge is missing
here at this time. This is
the flap barce. It is stepped down to clear the rear spar
reinforcings at the root side of it. This brace is the
achilles heel of the flap position, so drill it only to
the wings rear skin at this time. Once the partly
assambled flap is installed, you can shift it until the
lines of flap and aileron match, then you can drill some
holes to fix iton the spar. The piano hinge is missing
here at this time. |
 Here you
see the flap without the top skin attached to the rear
main skin with that piano hinge. Here you
see the flap without the top skin attached to the rear
main skin with that piano hinge. |
 This is
how it look from behind. The little pieces of aluminum
help to alingn the flap and aileron skin. Now you can fix
the inner aileron attachment arm and the outer position
of the flap brace by running a taut thread from outer
aileron top to inner flap top, after you've sliped over
the flaps top skin. This is
how it look from behind. The little pieces of aluminum
help to alingn the flap and aileron skin. Now you can fix
the inner aileron attachment arm and the outer position
of the flap brace by running a taut thread from outer
aileron top to inner flap top, after you've sliped over
the flaps top skin. |
 The flap
top skin is in place, a taut thread runs on top of the
flap and aileron to assure both run in line and the
thread runs around the tooling hole bolts, so you know
the flap is in it's neutral position. Now the flaps top
skin can be fixed by drilling 2 holes right into the
outer ribs. The flap
top skin is in place, a taut thread runs on top of the
flap and aileron to assure both run in line and the
thread runs around the tooling hole bolts, so you know
the flap is in it's neutral position. Now the flaps top
skin can be fixed by drilling 2 holes right into the
outer ribs. |
 The flap
was clamped down to the workbench everytime a hole was
drilled, it came out with no warpage at all. The flap
was clamped down to the workbench everytime a hole was
drilled, it came out with no warpage at all. |
 The top
skin runs around the trailing edge of the flap and ends
some inches after that. This row of rivets is hard to
set, because if you would bounce off the head too much,
there would be a ding in the top skin, it's thight fit. The top
skin runs around the trailing edge of the flap and ends
some inches after that. This row of rivets is hard to
set, because if you would bounce off the head too much,
there would be a ding in the top skin, it's thight fit. |
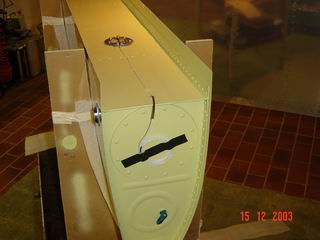
 Once the
flap is removed from the wing, riveted together and
installed again, this is how it looks. One height, one
level. Once the
flap is removed from the wing, riveted together and
installed again, this is how it looks. One height, one
level. |
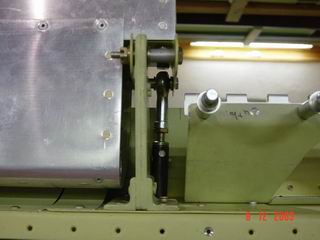
 This is
the inner aileron attachment arm (thats not the name the
plans call it, but now you know what I mean), rivited to
the rear spar after all this. You can see the hinge pin
runs right through that arm. this is not per plans, but
other wise you would have to cut the pin to insert it
from the middle of the hinge, and it can be done this way
if aileron is full down. It's a good point to secure the
pin, too. Aileron gap seal on the left, this looks
different on actual kits, similar to the flap brace. This is
the inner aileron attachment arm (thats not the name the
plans call it, but now you know what I mean), rivited to
the rear spar after all this. You can see the hinge pin
runs right through that arm. this is not per plans, but
other wise you would have to cut the pin to insert it
from the middle of the hinge, and it can be done this way
if aileron is full down. It's a good point to secure the
pin, too. Aileron gap seal on the left, this looks
different on actual kits, similar to the flap brace. |
 The
aileron pushrod. The
aileron pushrod. |
 The row of
rivets where the aileron gap seal is rivited to the wings
top main skin is hard to reach with a bucking bar, as you
can see. The row of
rivets where the aileron gap seal is rivited to the wings
top main skin is hard to reach with a bucking bar, as you
can see. |
 ...but it
works. ...but it
works. |
 Setting
the aileron travel the caveman way. It has to be 25-30
deg. up and I disliked the idea to buy an expensive
digital tool for that. There is a piece of plywood,
marked with 25 an 30 degree lines clamped to jig at the
turning point of the aileron. The marker is a long
drillbit inserted into the aileron bracket. Simply set
the bit parallel to the line and clamp on the control
stop. Meanwhile I've controlled it with a digital angle I
could borrow, an it's 29,8 degrees on the left and 30,2
on the right. Sufficient, eh? Setting
the aileron travel the caveman way. It has to be 25-30
deg. up and I disliked the idea to buy an expensive
digital tool for that. There is a piece of plywood,
marked with 25 an 30 degree lines clamped to jig at the
turning point of the aileron. The marker is a long
drillbit inserted into the aileron bracket. Simply set
the bit parallel to the line and clamp on the control
stop. Meanwhile I've controlled it with a digital angle I
could borrow, an it's 29,8 degrees on the left and 30,2
on the right. Sufficient, eh? |
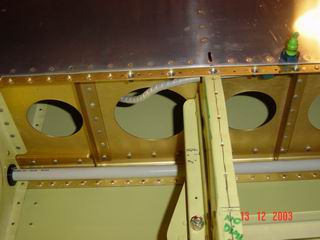 Now it's
time to finally close the wing, but at first I installed
the pitot line and the plastic guard for the wire that
runs to the wingtip position light. If you plan to
install that tubing, drill the holes when you straighten
all the ribs. It's hard to do once the ribs are
installed. Now it's
time to finally close the wing, but at first I installed
the pitot line and the plastic guard for the wire that
runs to the wingtip position light. If you plan to
install that tubing, drill the holes when you straighten
all the ribs. It's hard to do once the ribs are
installed. |
 Tanks are
primed and fuel senders installed. Tanks are
primed and fuel senders installed. |
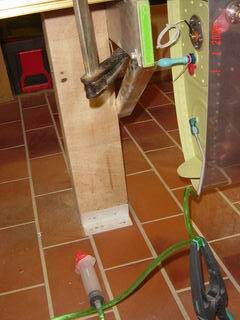 Pressure
testing of the tank. Any children around? You need some
baloons and that bubblewater (whats that in english??) to
find a leak. Left tank: Pressure gone after 15 minutes,
right tank the same. ''*"!?'* Pressure
testing of the tank. Any children around? You need some
baloons and that bubblewater (whats that in english??) to
find a leak. Left tank: Pressure gone after 15 minutes,
right tank the same. ''*"!?'*Another baloon, control all fittings, same procedure, same result... Seal the baloon connection, seal the green hose, same result. Hey, Evan, what's that? No, no, watch the next image ;o) |
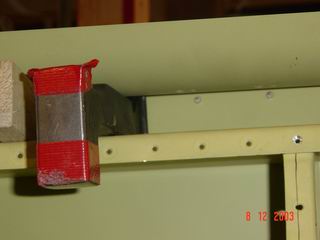
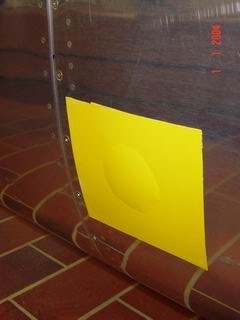 The fuel
cap! You see that bubble under the yellow tape? The fuel
cap! You see that bubble under the yellow tape?Puh! After this fix: Both baloons under pressure for 24 hours, give me AVGAS! |
 Done! Done! |